Heading to the Philippines for a week with two energetic boys (ages 3 and 1)!
To avoid long waits at baggage claim and the risk of lost luggage, I challenged myself to travel with carry-on luggage only.
As a Registered Nurse (RN) and a mom, I’ve refined my packing list to be as light and functional as possible. Here’s what worked, what didn’t, and what you really need.
My Packing List (Carry-on Baggage Essentials)
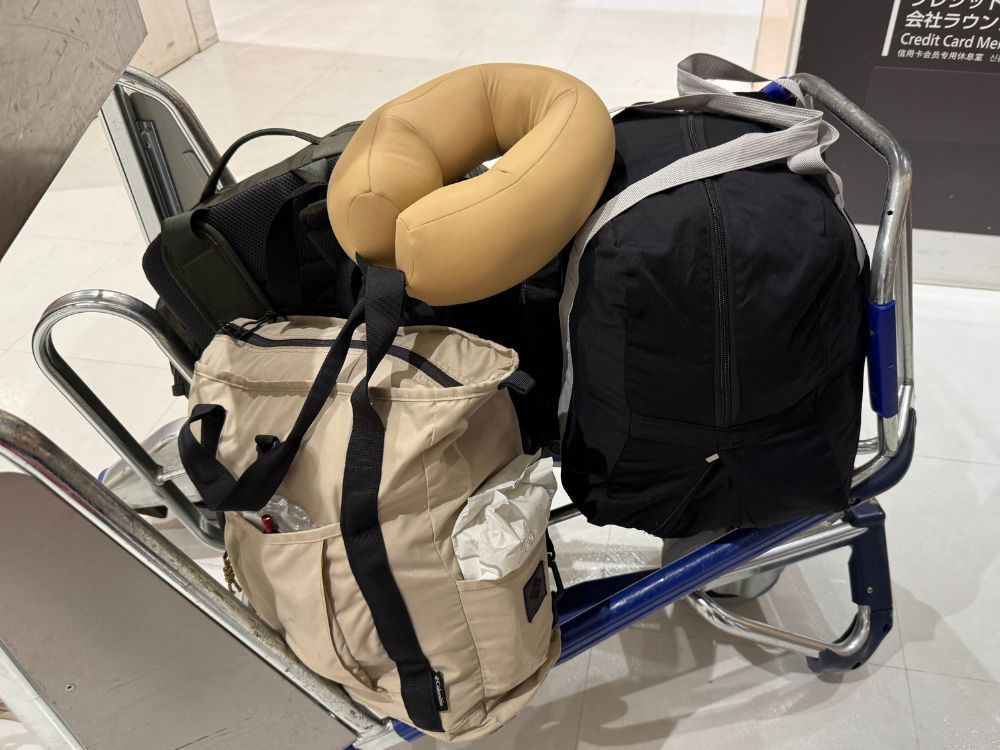
I divided our luggage into three separate bags depending on how we used them. Although the winter clothes we wore from home and the extra snacks we bought before boarding took up more space than expected, we managed to pack everything and move around!
Bag 1
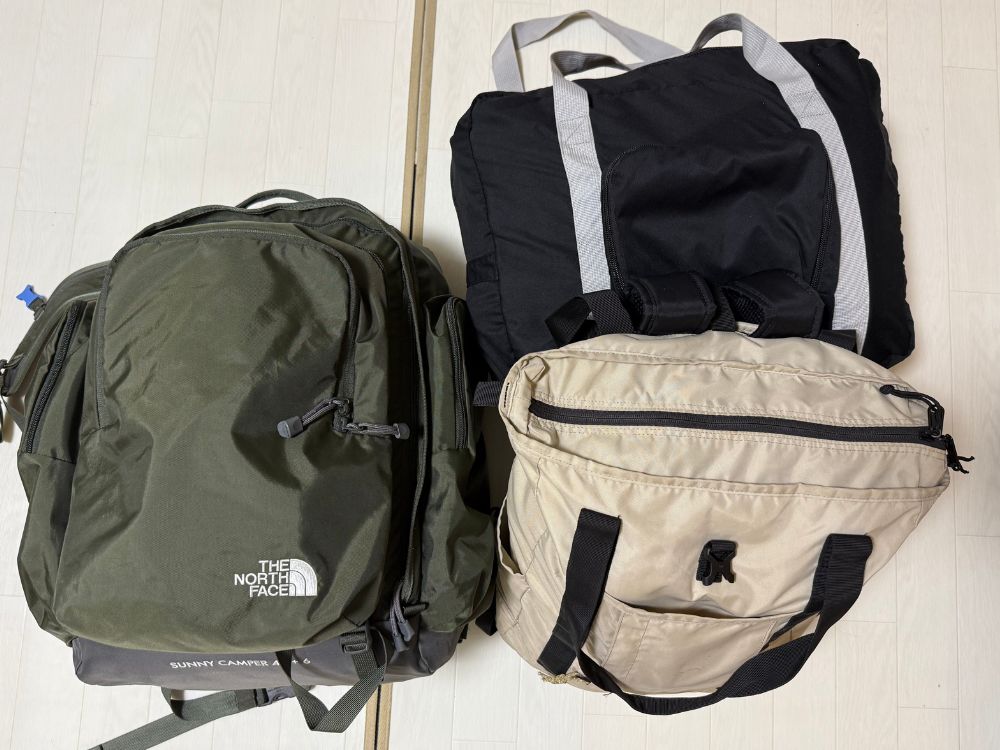
My go-to is a green THE NORTH FACE backpack called the “SUNNY CAMPER,” packed with clothes and diapers. It’s actually designed for kids’ school trips, but it’s the perfect size for maximizing carry-on capacity. It features a detachable 6-liter daypack, giving it a total capacity of 40+6 liters. We use it for every trip, and my husband even uses it for his business trips!


Bag 2 My Go-To “Diaper Bag”: Columbia Great Smoky Garden 2-Way Tote
This is the bag I keep right at my feet during the flight. It’s incredibly lightweight and durable—the ultimate “mom’s survival bag” for traveling with toddlers.
Why I Love This Bag:
- Effortless 2-Way Switch: You can easily switch between a tote and a backpack. This is a lifesaver when you’re already juggling a toddler in a front carrier or on your back, but need to grab something quickly.
- The Perfect 20-22L Capacity: It’s the ideal size for a carry-on. It fits all the “anti-fussy” goods (toys and snacks) perfectly without feeling bulky.
- Water-Repellent & Tough: Made with Columbia’s “Omni-Shield” technology, it resists water and stains—essential when traveling with kids!

Bag 3・4
The rest of our luggage included a large Boston bag (Bag #3) and a small black foldable bag for last-minute items. The black bag is incredibly compact—when folded, it’s about the size of two smartphones! My husband actually got it as a giveaway at an event. Even though it’s small, it was a lifesaver for those unexpected extra items and for gathering all our loose belongings once we landed.
Bag 5 THE NORTH FACE Base Camp Duffel (90L)
Inside Bag #3, I also packed a THE NORTH FACE Base Camp Duffel (90L). This bag is a legend among travelers for being waterproof and incredibly durable. While we split our luggage into smaller bags to meet carry-on requirements, as soon as we land, we stuff everything into this 90L duffel for easy transport from Manila to our final destination. Even though it’s huge, it has shoulder straps so you can carry it like a backpack!

The Ultimate Packing List: What’s Inside?
Essentials & Tech
- Passports & Smartphones
- Chargers & Power Banks
- 2 Baby Carriers (Stay tuned for the results…!)
- Souvenirs (For friends in the Philippines)
Clothing & Linens
- Extra changes of clothes
- Swimwear
- 2 Swaddles / Muslin blankets (Multi-purpose!)
Nurse’s Selection: Medical & Hygiene
- Basic First Aid: Band-aids, Nail clippers, Thermometer
- Sanitization: Hand sanitizer, Sterile cotton wipes, Disinfecting wipes
- Medications: Painkillers (Loxonin), Motion sickness pills, Laxatives, Probiotics
- Skincare: Sunscreen, Insect repellent
- Personal Care: Toothbrush sets, Sunglasses, Hats
For the Kids (Flight Survival)
- Digital: iPad & Bone conduction headphones
- Offline: Sticker books, Coloring books
- Food: Snacks & Emergency light meals
Pre-Departure Checklist: Don’t Leave Without Doing These!
Passport Tips for Traveling with Kids
Start Early (2–3 Months Before)
Don’t wait until the last minute! While processing times vary by country, I recommend having everyone’s passports ready at least 2–3 months before your trip. This gives you a buffer in case you need to redo photos or applications.
Taking Passport Photos at Home (DIY)
Professional studios can be expensive, so we decided to take the photos ourselves using a smartphone. Here is what we learned:
- For Toddlers: My 3-year-old stood in front of a plain white wall. It was quick and easy!
- For Infants (The “Bumbo” Hack): My 5-month-old couldn’t sit up yet. At first, I tried laying him on a white sheet, but the background was rejected due to wrinkles/texture.
- The Solution: I put him in a Bumbo seat in front of a white wall. This kept him upright and ensured a clean, acceptable background.
Don’t Forget: Complete the “eTravel” Registration!
To ensure a smooth entry into the Philippines, you must register for eTravel. This is a mandatory digital requirement, and forgetting it can cause major stress at the airport!
- When to do it: You can register starting 3 days before your arrival.
- Time management: It took me about 20–30 minutes to complete the forms for the entire family. If you are not used to the system, make sure to set aside enough time.
- Pro-tip: Once finished, take a screenshot of the QR code for every family member. You will need to show them at immigration, even if you don’t have an internet connection.vel)
Choosing ZIPAIR: The Best Budget-Friendly Option
For this trip, we prioritized cost-performance and chose ZIPAIR, a low-cost carrier (LCC) owned by Japan Airlines (JAL).
I honestly had an amazing experience—the service exceeded my expectations for an LCC, and I have only positive things to say! I will write a more detailed review of the in-flight experience and services in a separate post, so stay tuned.
Best Items We Brought: Top Recommendations
A Hidden Gem: Sterile Cotton Wipes (Cleaning Wipes)
As a nurse, this is one of my top hygiene essentials for international travel. In Japan, these are called Mekkin Seijo-men—individualized, sterile water-soaked cotton wipes.
Why they are so useful
- Eyes and Mouth: Perfect for gently wiping a baby’s sticky face or crusty eyes after a nap.
- Breastfeeding: Ideal for cleaning before or after nursing when you’re on the go.
- Hygienic: Since each wipe is individually wrapped and sterile, they are much safer and cleaner than using a large pack of wet wipes that can dry out or grow bacteria.
- Pro-tip: They are very lightweight, so I tucked a bunch of them into my medical kit. They don’t count as “liquids,” making them perfect for carry-on luggage!

Bone Conduction Headphones: A Flight Essential for Kids
We brought these as part of our “airplane survival kit” for the children.
Depending on where you sit, the engine noise on a plane can be quite loud, making it very difficult to hear audio without some form of headphones. However, standard earbuds are often too large for children’s small ears, and over-ear headphones can block out too much sound, making it impossible to have a conversation with them.
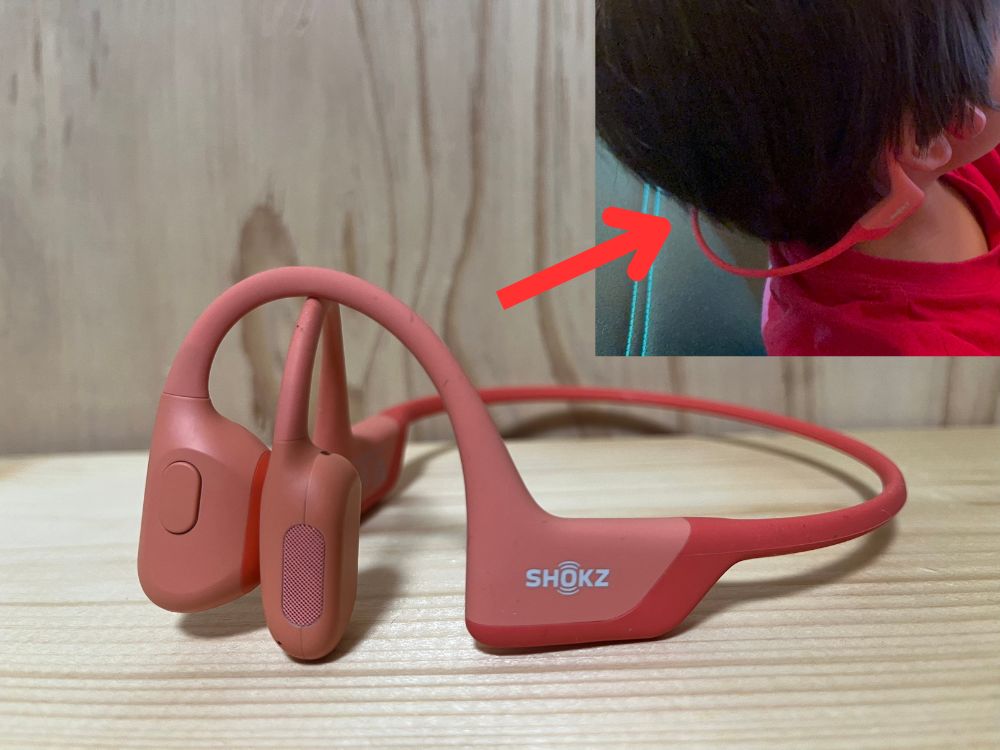
That’s why we use bone conduction headphones. They leave the ears open, yet the sound is easy to hear, and there is no sound leakage to those around us. My kids were able to watch their movies while still being able to talk to me, and they never complained about their ears hurting. They were truly a lifesaver!
We decided on the Shokz OpenRun Pro after letting the kids try several models in the store to check the sound quality and comfort.
I highly recommend choosing a sports-type model like this one. They tend to have a more secure grip, which helps them fit much better on children’s smaller heads compared to standard designs.

Results: Things I Didn’t Actually Need (Reflection)
Too Much Cash
We brought 50,000 JPY thinking we’d exchange it locally for our one-week stay. However, most places accepted credit cards, and we barely used cash. When we did need it, we just used a credit card at an ATM for a cash advance. The exchange rate was fair, and it’s much safer than carrying a large amount of cash.
Note: Make sure to check your credit card settings for repayment (to avoid automatic revolving payments).
Two Baby Carriers
I was so determined that I thought, “I might have to carry both kids and run!” so I packed two carriers. In reality, that situation never happened (lol). One was definitely enough.
Sunglasses
Since we visited in December, the dry season in the Philippines was cooler than expected. The sunlight wasn’t that intense, so I never found a reason to wear them.
Excessive Snacks
Many Grab (rideshare) drivers in the Philippines don’t allow eating in the car. Between that and the fact that local Filipino snacks are delicious, we hardly touched the ones we brought. However, the locals were happy to receive our leftovers as small gifts, so it worked out in the end!
Things I Wish I Had Brought
A Light Long-Sleeved Shirt
I assumed it would be hot, but the dry season (December to May) is actually quite breezy and pleasant. However, the air conditioning in Grab cars and malls can be very strong, and there are mosquitoes outside. A thin, long-sleeved shirt would have been perfect for protection against both the cold and bugs.
Summary: Don’t Pack Your Anxiety
My goal for this trip was “Don’t fill your luggage with anxiety.” Prepare well for emergencies (like a medical kit), and trust that you can manage the rest. Traveling light gave me more than just extra space—it gave me the mental freedom to enjoy every moment with my boys.