A baby carrier is a lifesaver if you’ve got a kid who always wants to be held. Babywearing is universal — I think it’s one of the best parts of raising kids.
In this post, I’m sharing everything I’ve learned from about 5 years of carrying my two boys (2 years apart), both certified always-wants-to-be-held types.
- Carry at the Right Height to Prevent Back Pain!
- Dealing With the “Back Switch”
- Creative Uses for Forward-Facing Carries
- An Easy Way to Carry on Your Back
- What to Do When You Can’t Reach the Back Buckle
- How to Put the Carrier On Over a Jacket
- Hacks That Come In Handy When You’re Out
- For Kids Who Don’t Like the Carrier: The “Pretend Carry”
- Nursing in the Carrier
- In Summary
Carry at the Right Height to Prevent Back Pain!
People see me carrying my kids all the time and often ask, “Doesn’t your back hurt?” or “I couldn’t do that, my back’s too bad.”
Back pain aside, everyone’s strength and stamina is different, but I’m not doing this without any effort either.
The things I focus on are daily stretching, carrying consistently, and paying attention to how I position the carrier.
One thing anyone can easily fix is the carrying position.

A Bad Example
The carrier has slipped down and the child is swaying around.
This puts strain on your shoulders and back.
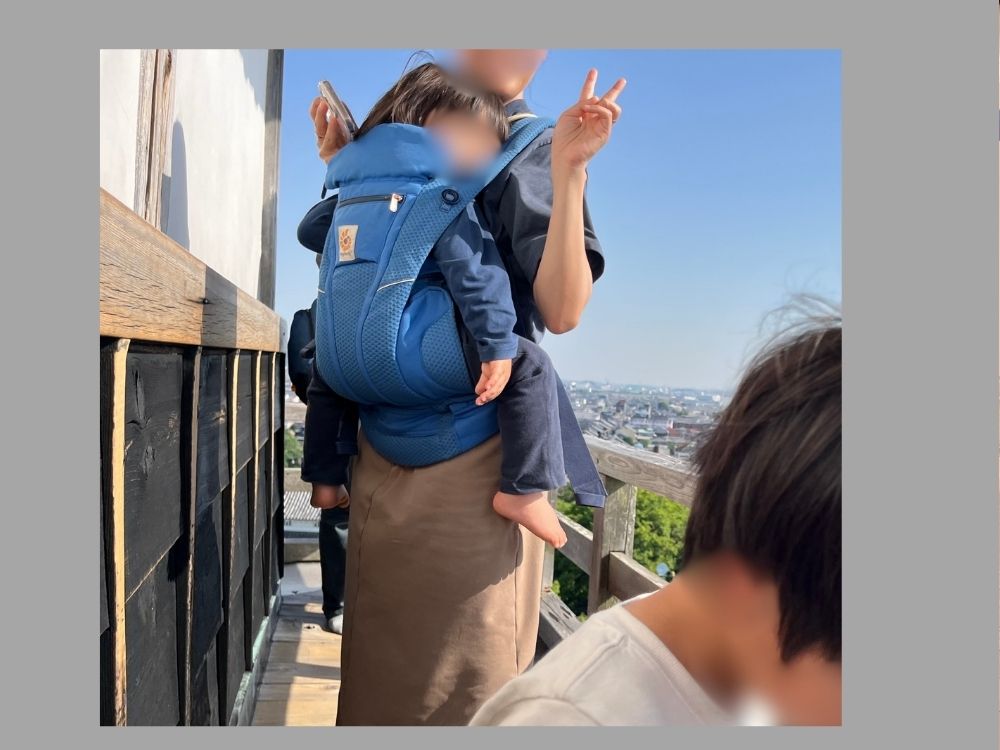
A Good Example
The baby is held snugly against the body, high up.
Because they’re snug against you, there’s no wobble when you walk, and your shoulders and back stay comfortable!
- Get a snug fit around your waist
- Pick up your child
- Fasten the back buckle
- Tighten the side straps
- Lift your child’s bottom up and re-tighten the side straps
- Re-tighten the back buckle too

I see a lot of people whose step 1 starts off too low or too loose, or whose child ends up sitting too low, putting strain on the back.
I’ve had a lot of friends and people I’ve met at parenting centers put their carrier on themselves, then fixed it for them — every single time they say, “Oh, that’s so much easier!” So check in front of a mirror to make sure it’s fitted snugly to you!
Carrying Tip
Adjust as needed to keep your child snug against your body!!
Dealing With the “Back Switch”
Some kids have a strong “back switch” — the “back switch” (when a sleeping baby wakes up the instant you set them down) — and some barely have one at all. Kids without much of a back switch can fall asleep on a futon or in a stroller without being carried, so even if you are carrying them, it’s easy to put them down.
The problem is the always-wants-to-be-held type (lol). They love being carried so much that it’s hard to put them down. I’d heard CUSEBERRY was supposed to make this easier too, but personally I found the legs got in the way and it was tricky.
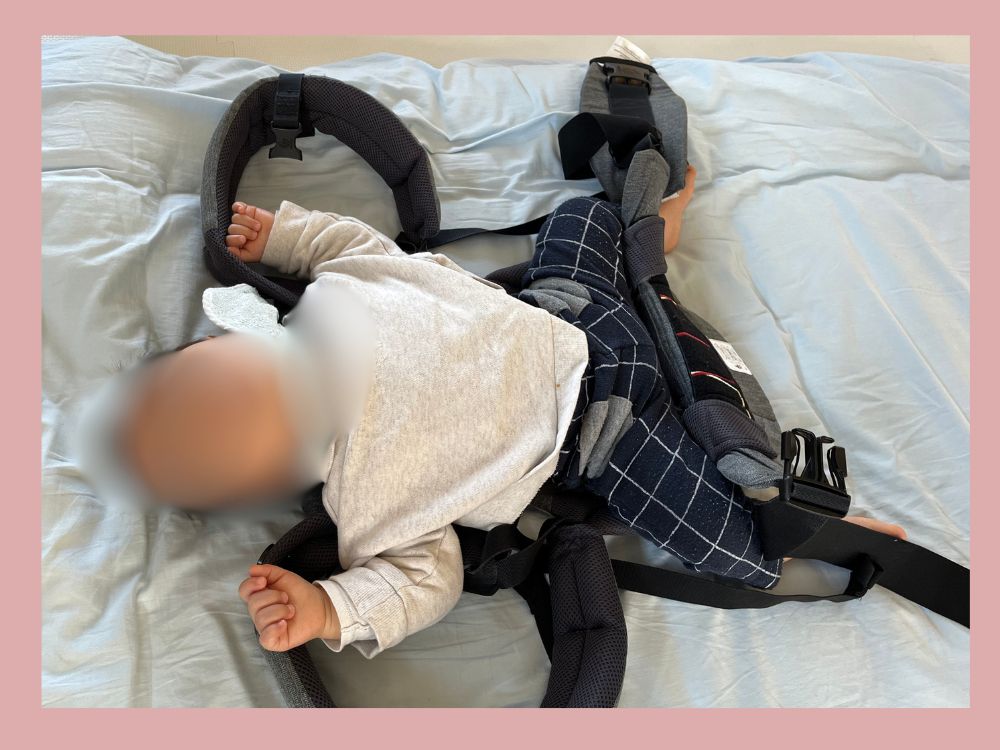
For times like that, my go-to move is: put them down carrier and all! Just as it sounds — once they’re asleep, loosen the carrier, gently lower yourself to lay their back down while hovering over them, and undo the buckle while using your head to support your own weight. Surprisingly, it actually works.
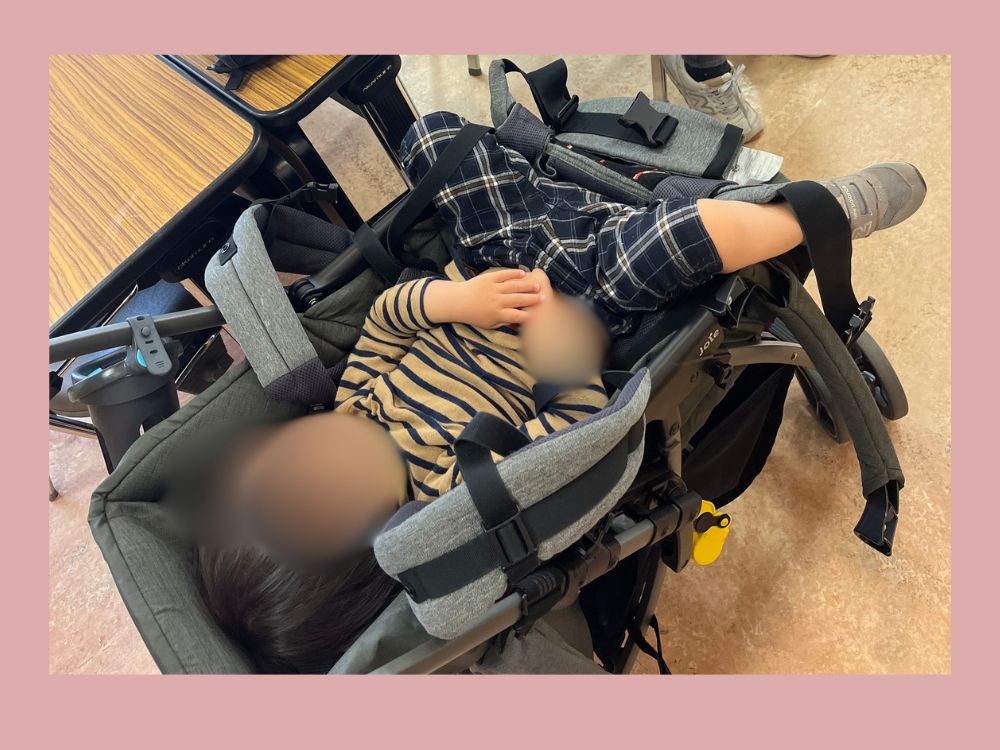
I think kids with a strong back switch generally don’t stay asleep for long once they’re set down anyway. They’ll wake up once they roll over, but until then, it’s surprisingly okay.
Creative Uses for Forward-Facing Carries
A forward-facing carry isn’t just for walking around — it comes in handy in all kinds of situations!
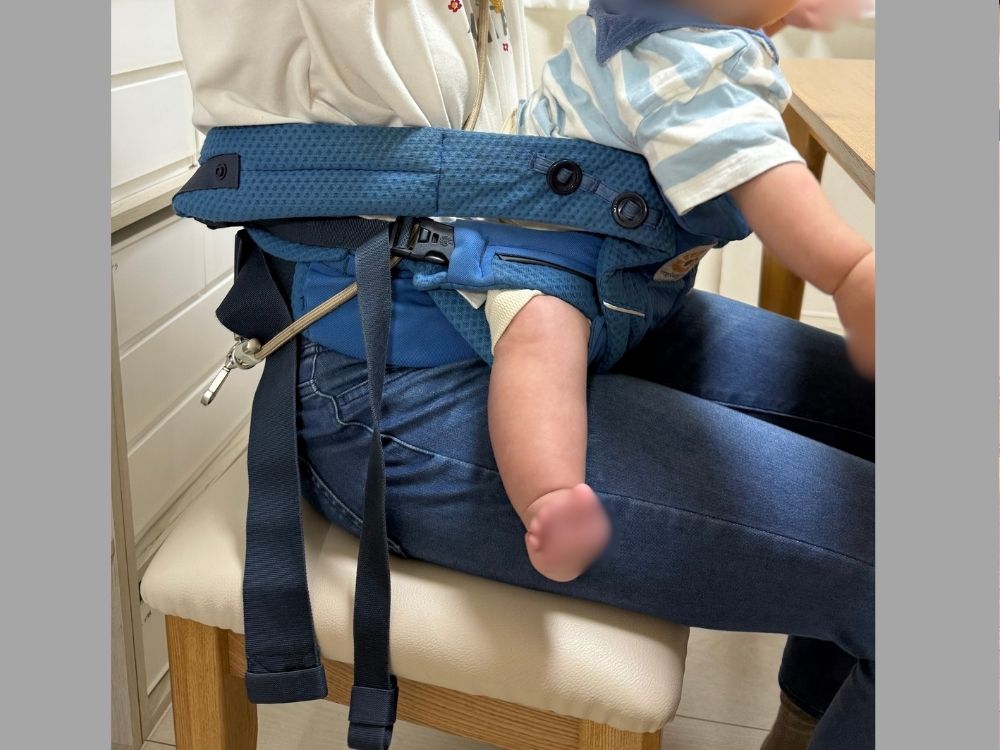
I use it as a way to prop them up on my lap at mealtimes, for one,
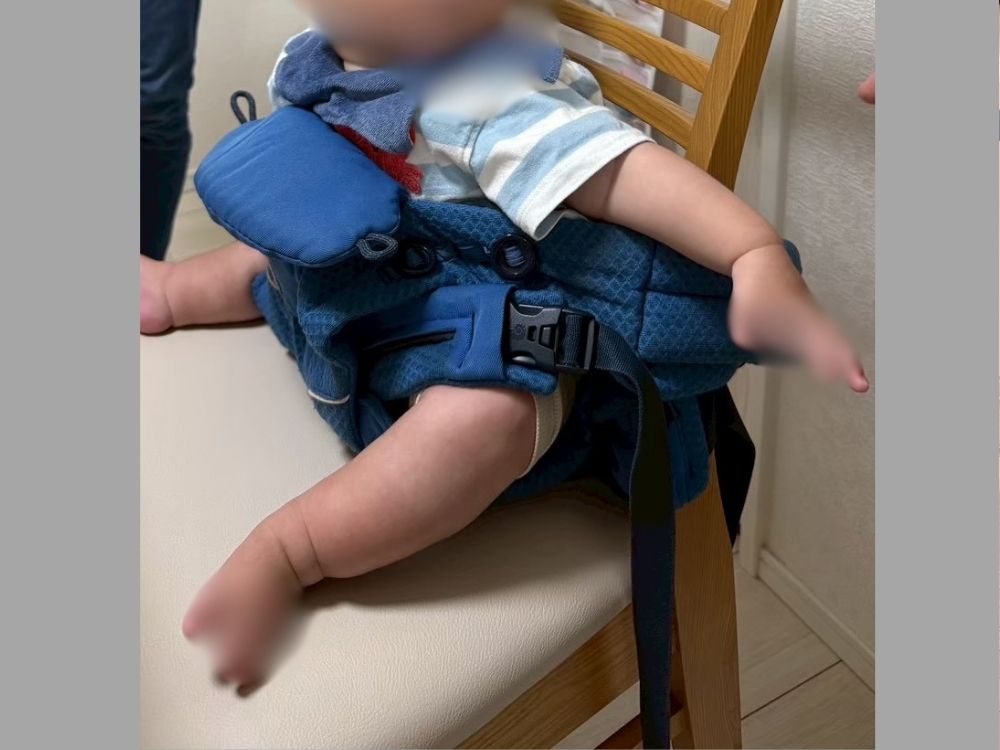
and I’ve also tied it to a chair to use as a portable chair strap!
This trick makes eating out so much easier!! It’s hard to do with other carriers because of their shape or adjustability, so this is one of Ergobaby’s best uses!
Turn the Head Support Into a Guard!
You won’t need it when they’re tiny, but once they’re past age 2 and napping in the carrier, the head support becomes really handy.
But it’s also useful at mealtimes!
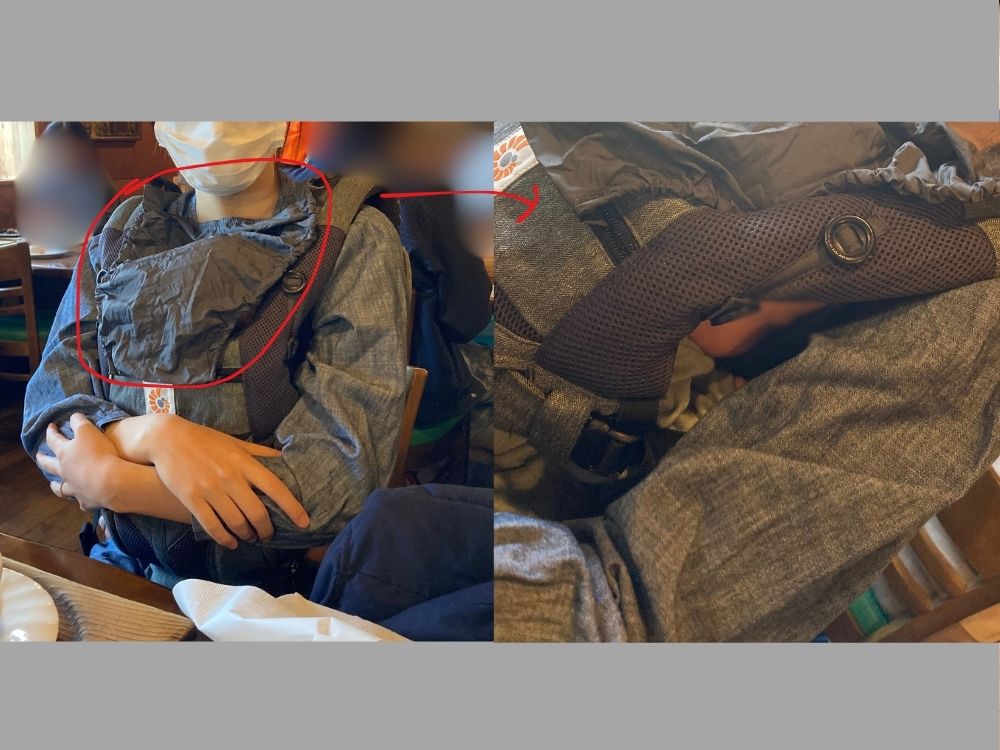
For those times when your kid’s asleep while you’re trying to eat, I’d use it as a shield so my food wouldn’t land on their head (lol).
I used to think the head support wasn’t necessary when they were little, but it becomes really useful as they get bigger! Especially when babywearing on your back, since their neck can end up arched way back (lol). It depends on your child’s size, but I’d definitely recommend using it!
An Easy Way to Carry on Your Back
I discovered a way to get them onto your back easily, even without the official “wrapped up” method (lol).
It’s not the official method — it’s a way to swing them around to your back without undoing the back buckle.
The footage is a bit rough, but here’s roughly how it goes.
- Carry your child normally, facing you.
- Loosen the waist strap just enough that it can still shift, and loosen the side and back straps well.
- Slip your right arm out, support your child’s bottom with your left hand, and while bracing yourself with your right hand, give a small hop to shift your child around to your back on the left side.
- Lean forward to adjust your child’s position, thread your right arm back through, and retighten the straps — done!

The trick is to get your child settled well toward your lower back first!
It helps to practice on a futon at first, or with someone else supporting you — you’ll get the hang of it faster than you’d expect!
“It’s scary until you get used to it, but then it’s fine” is something everyone seems to agree on — and it’s not just the parent who gets used to it, your child will too!
So try practicing together with your child’s cooperation!
Once they fall asleep, their body goes limp and their neck can end up arched back like this.
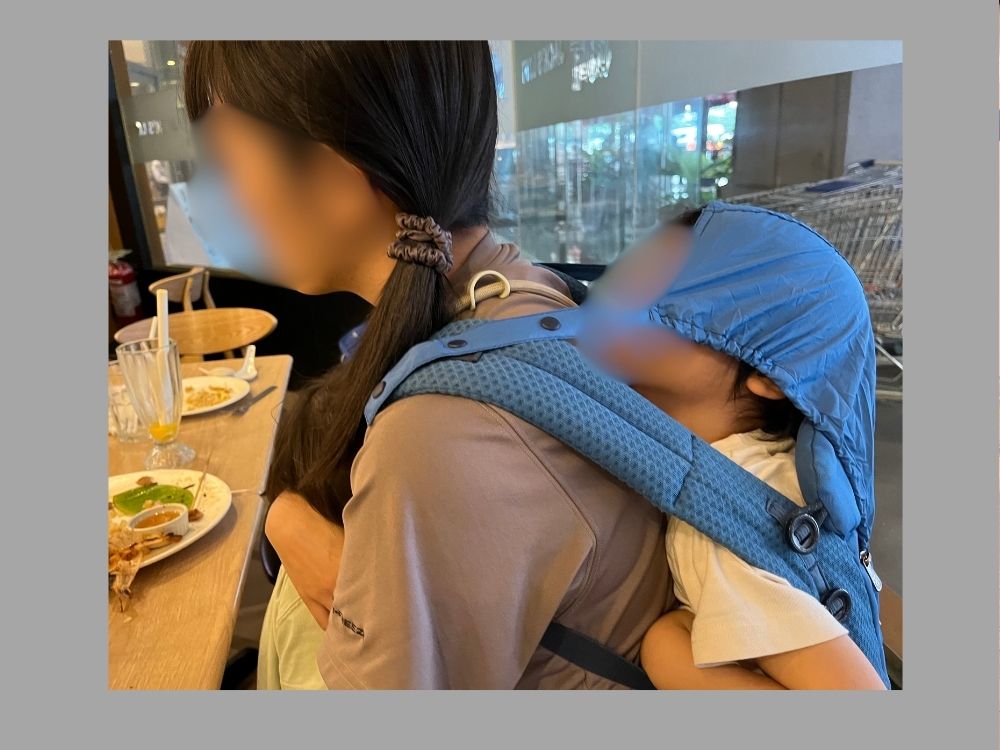
Once they’re bigger, using the head and neck support helps keep them stable!
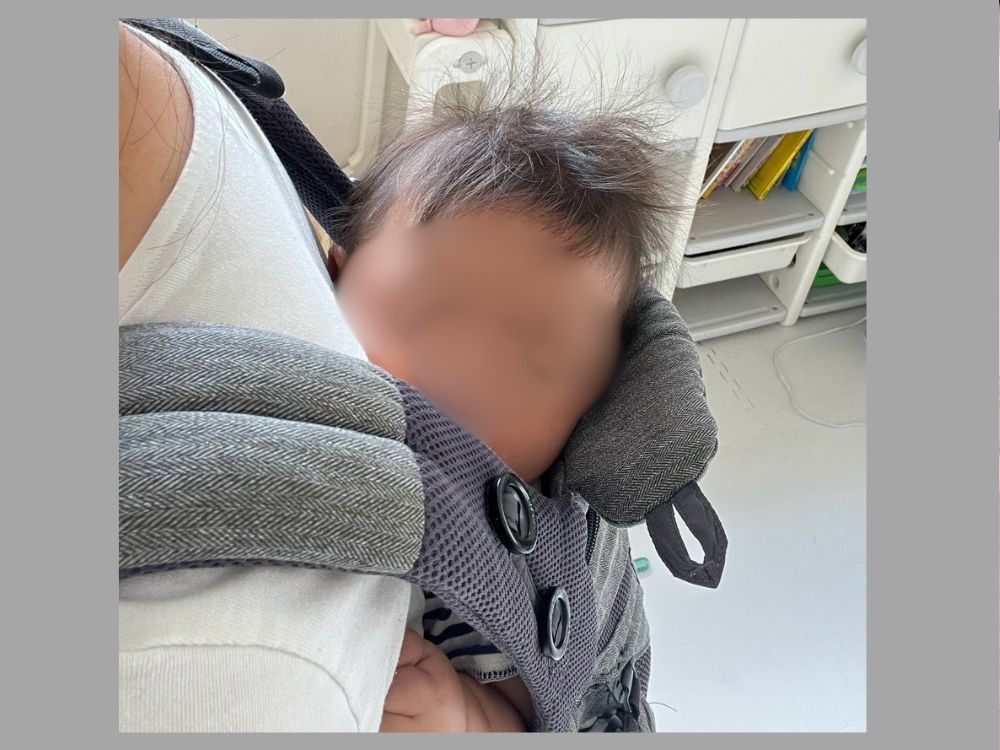
When they’re little, it’s reassuring to check their face isn’t showing any distress using your phone’s front camera, and to feel for their breathing against your back!
What to Do When You Can’t Reach the Back Buckle
My husband’s friend once asked me about this too — it’s usually solved by adjusting the position of the back buckle.
You can slide it up or down like this, so move it somewhere within easier reach.
Also, if the side straps are too tight, that makes it harder to reach too. Keeping the following points in mind makes it a lot easier.
Tips for Putting the Carrier On and Off
Putting it on: loosen the strap behind your neck and the side straps first ⇨ tighten the sides ⇨ tighten behind your neck
Taking it off: loosen the side straps ⇨ undo the strap behind your neck
If your body is stiff to begin with, using a carrier is going to leave your shoulders and back feeling awful. Stretching until putting the carrier on and off feels easy makes a huge difference!!
How to Put the Carrier On Over a Jacket
This one’s actually pretty simple to solve. Without undoing the back buckle, just loosen the side straps and put your child’s legs in first.
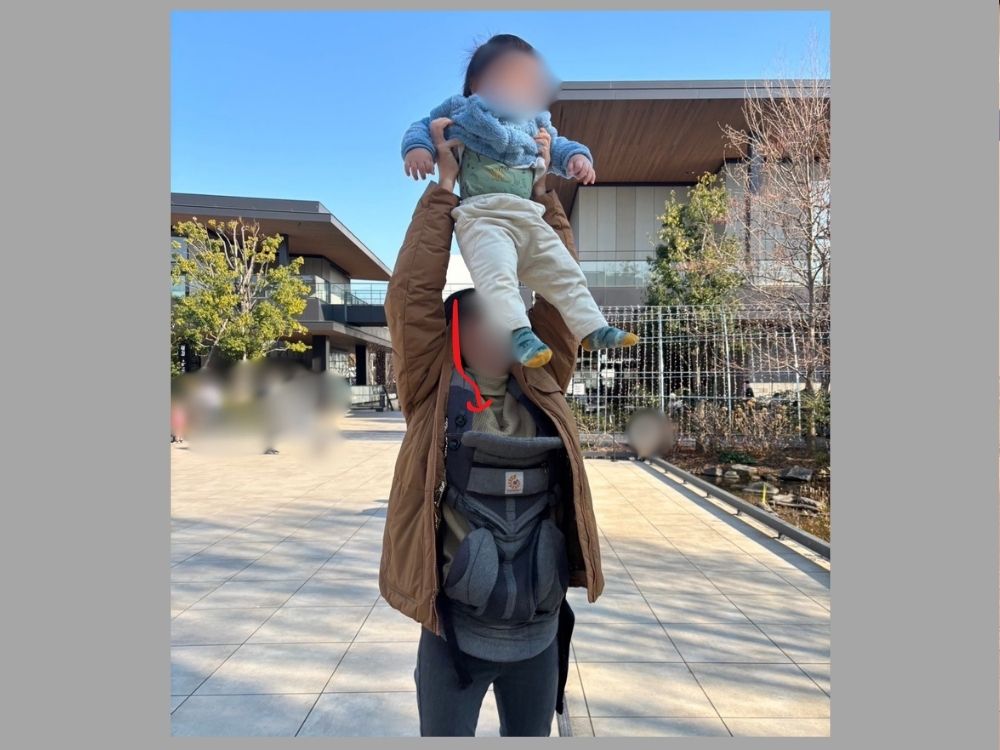
Reach your hand in through the leg opening to guide their leg through, then do the same on the other side. Once both legs are in the right position, tighten the side straps.
*In this photo I’m just holding them up for the picture — you can actually get their legs in at a much lower position!
Taking them out takes a bit more effort than putting them in. While they’re light, it’s mostly just brute force, but as your child grows, they start moving their own legs to help both going in and coming out!
You could just take your jacket off, but that’s a hassle, so I just treated it like a mini workout (lol).
Hacks That Come In Handy When You’re Out
When You’re Not Using the Carrier
Even the most carry-obsessed kid eventually starts wanting to walk on their own as they grow. But the moment they get tired or just don’t feel like it, they’re right back to wanting to be held (lol).
Putting the carrier on from scratch every single time that happens is a hassle, so I always kept it standing by around my waist.
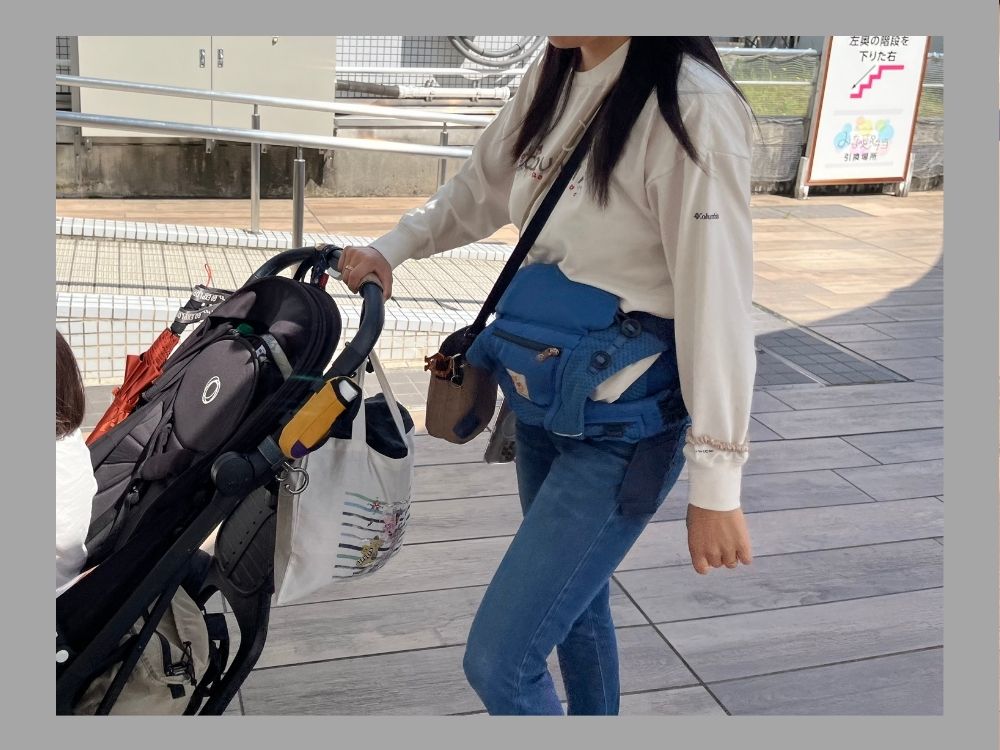
If you fasten the back buckle and cinch the side straps all the way like this, it fits snugly against your body.
It won’t drag on the ground, and it doubles as a makeshift hip seat or a place to stash things.
When it wasn’t in use carrying a kid, I’d often use it to hold drinks (lol).
A Spot to Stash a Card
This one’s really handy when traveling abroad. There’s a pouch that comes with the carrier, but your child’s bottom tends to get in the way, making it hard to grab things out of it.
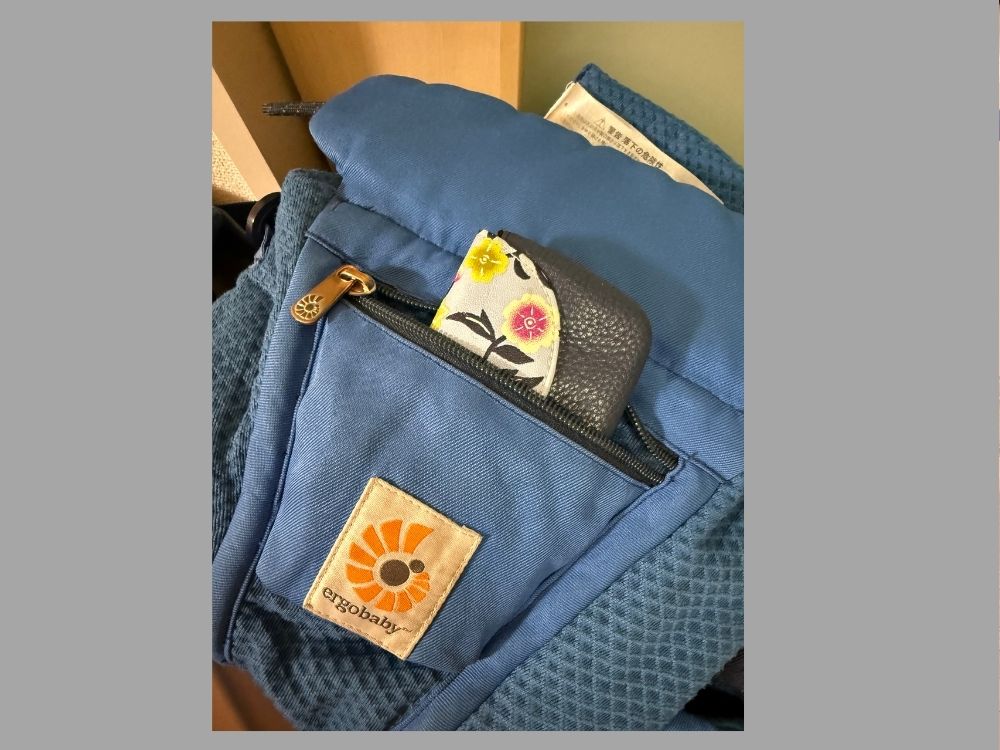
No one would ever guess there’s a card tucked in here, and even if someone did try to reach for it, they’d have to come right at you from the front — so you’d definitely notice.
For Kids Who Don’t Like the Carrier: The “Pretend Carry”
My older son was such a carry-obsessed kid that I used to wonder if there were even babies who disliked being carried — but it turned out my younger son loved being held, just not in the carrier.
I wanted to hold him in my arms, but with my older son also needing attention, I couldn’t do that all the time…
So I came up with the “pretend carry.”
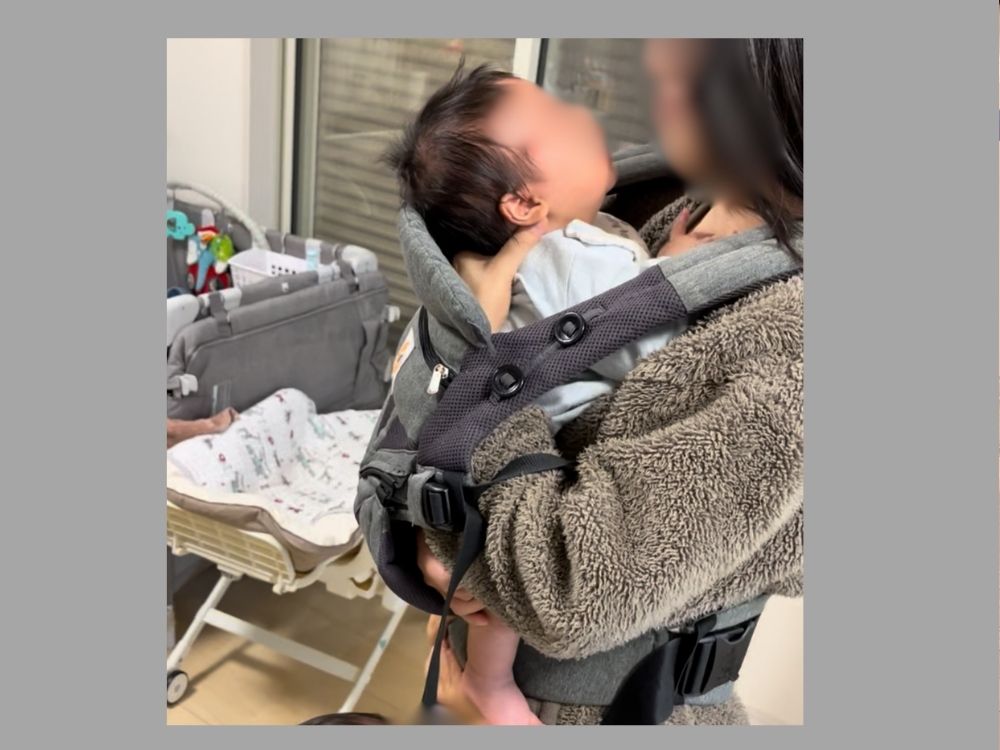
Basically, you slip one hand into the carrier like this and pretend to support their bottom. Pat their head with your other hand, and it really does look like you’re holding them (lol).
It also works well when they’re fussy and squirming, so give it a try!
Nursing in the Carrier
When people think of nursing, a nursing room is probably what comes to mind.
For the first few months after my older son was born, I was searching out nursing rooms too — but as he grew, nursing shifted from being about nutrition to functioning more like a tranquilizer or sleep aid (lol).
My older son was born in December, so by the time he needed to nurse more frequently, it had gotten hot out — which made it hard to find a nursing room in time, and a nursing cover felt way too warm.
I also started feeling like, even though a nursing cover hides everything, it makes it pretty obvious you’re nursing right now — and I didn’t love that either.
So that’s when I started nursing in the carrier.
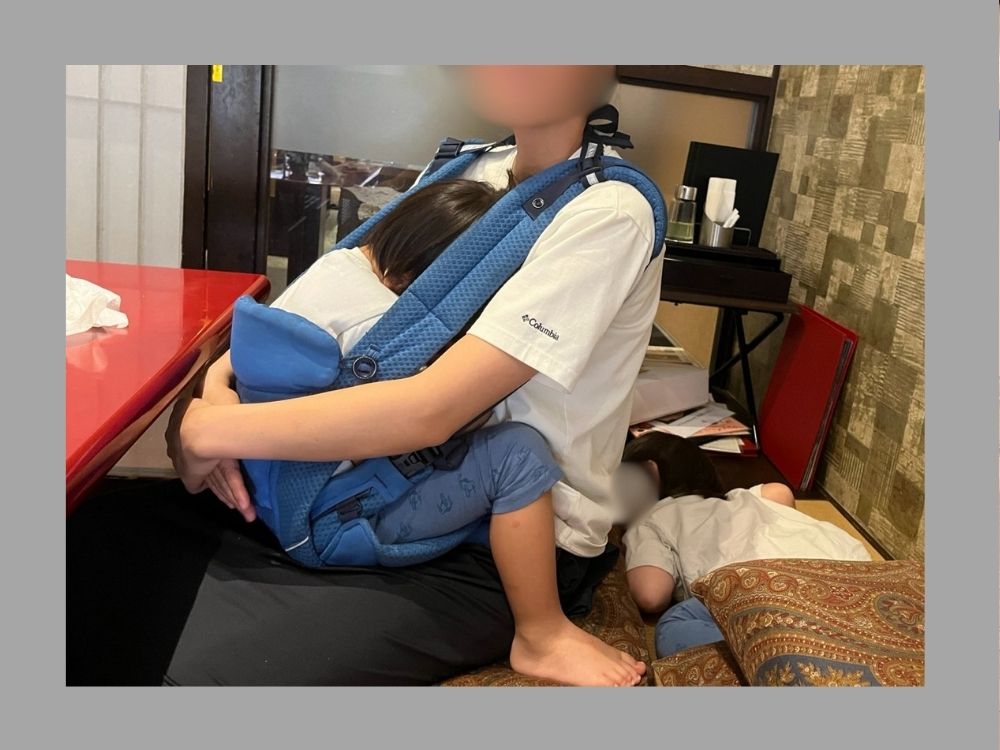
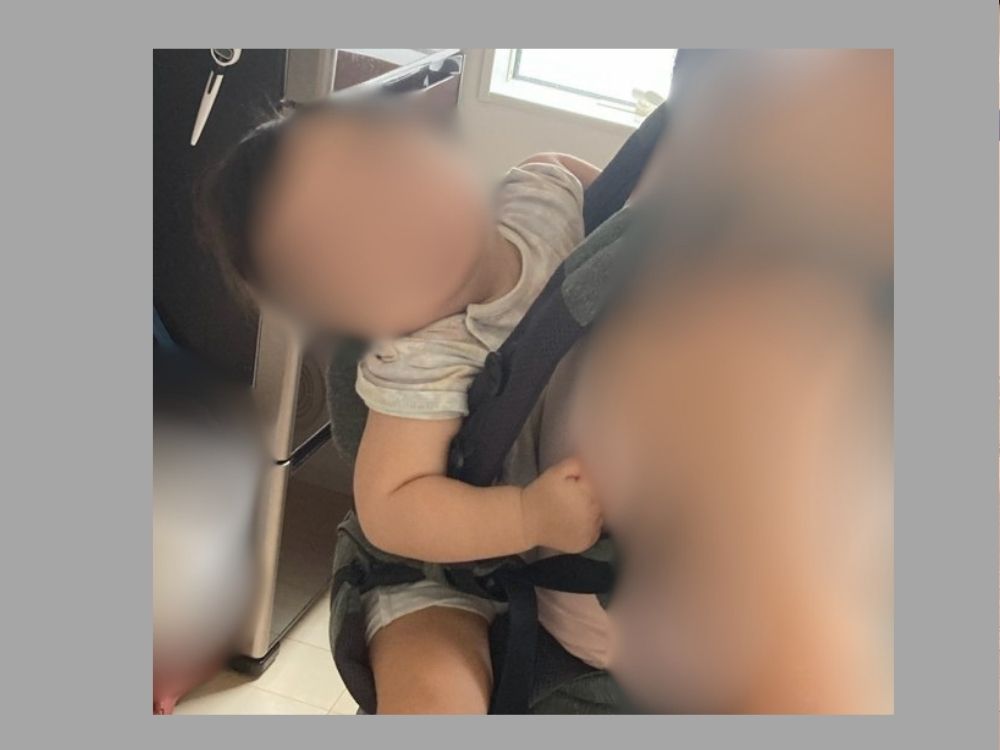
It’s simple: just start nursing while your baby is still in the carrier!
Tips for Nursing in the Carrier
Wear separate top and bottom pieces
⇨ I tried just about every kind of nursing top out there, but ones with side nursing openings or a row of buttons down the middle open vertically, which makes it easy for things to show.
Match the color of your top and your inner layer
⇨ I tried nursing bras too, but something shaped like a UNIQLO Bra Top (a camisole with a built-in shelf bra) works best. If the colors match, no one can tell even if it rides up!
(*A snap-front nursing bra requires opening it up wide and is a hassle to fix afterward, so I wouldn’t recommend it for nursing in the carrier.)
Adjust the strap length
⇨ As your child grows, the position that’s easiest for them to nurse from changes too. Adjusting the length of the side straps means you can keep this up from the time their neck is steady all the way to age 4!
Once their neck is steady, your child starts finding the right position on their own, which makes it dramatically easier!
I checked myself in the mirror over and over, and had my husband and friends check from every angle to make sure nothing was showing, honing my technique (lol).
As a result, I got good enough that even strangers peeking over and asking “oh, is she asleep?” had no idea what was actually going on!
Being able to do it anywhere — on a bike, on a packed train, at a restaurant, on a plane — made going out so much more comfortable.
The side view is the easiest angle for things to show, so keep that in mind. If you’re not confident yet, throwing on an extra layer on top blocks the side view, so I’d recommend that!
In Summary
I once heard people say things like, “You shouldn’t carry your baby too much, or they’ll get used to it.”
But honestly, carrying is the best! Your kid can’t make a break for it while you’re carrying them, and best of all, you get their adorable face all to yourself (lol).
My older son, who was such a carry-obsessed kid that I carried him all through my pregnancy with my younger son and long after he was born, barely wants to be carried anymore now that he’s four and a half.
My younger son is two and a half now too, and walks on his own plenty, so how often I carry him has dropped a lot as well.
Just make sure to take good care of your own body, and I hope you get to enjoy all that adorable carrying time!
Thanks so much for reading all the way to the end.
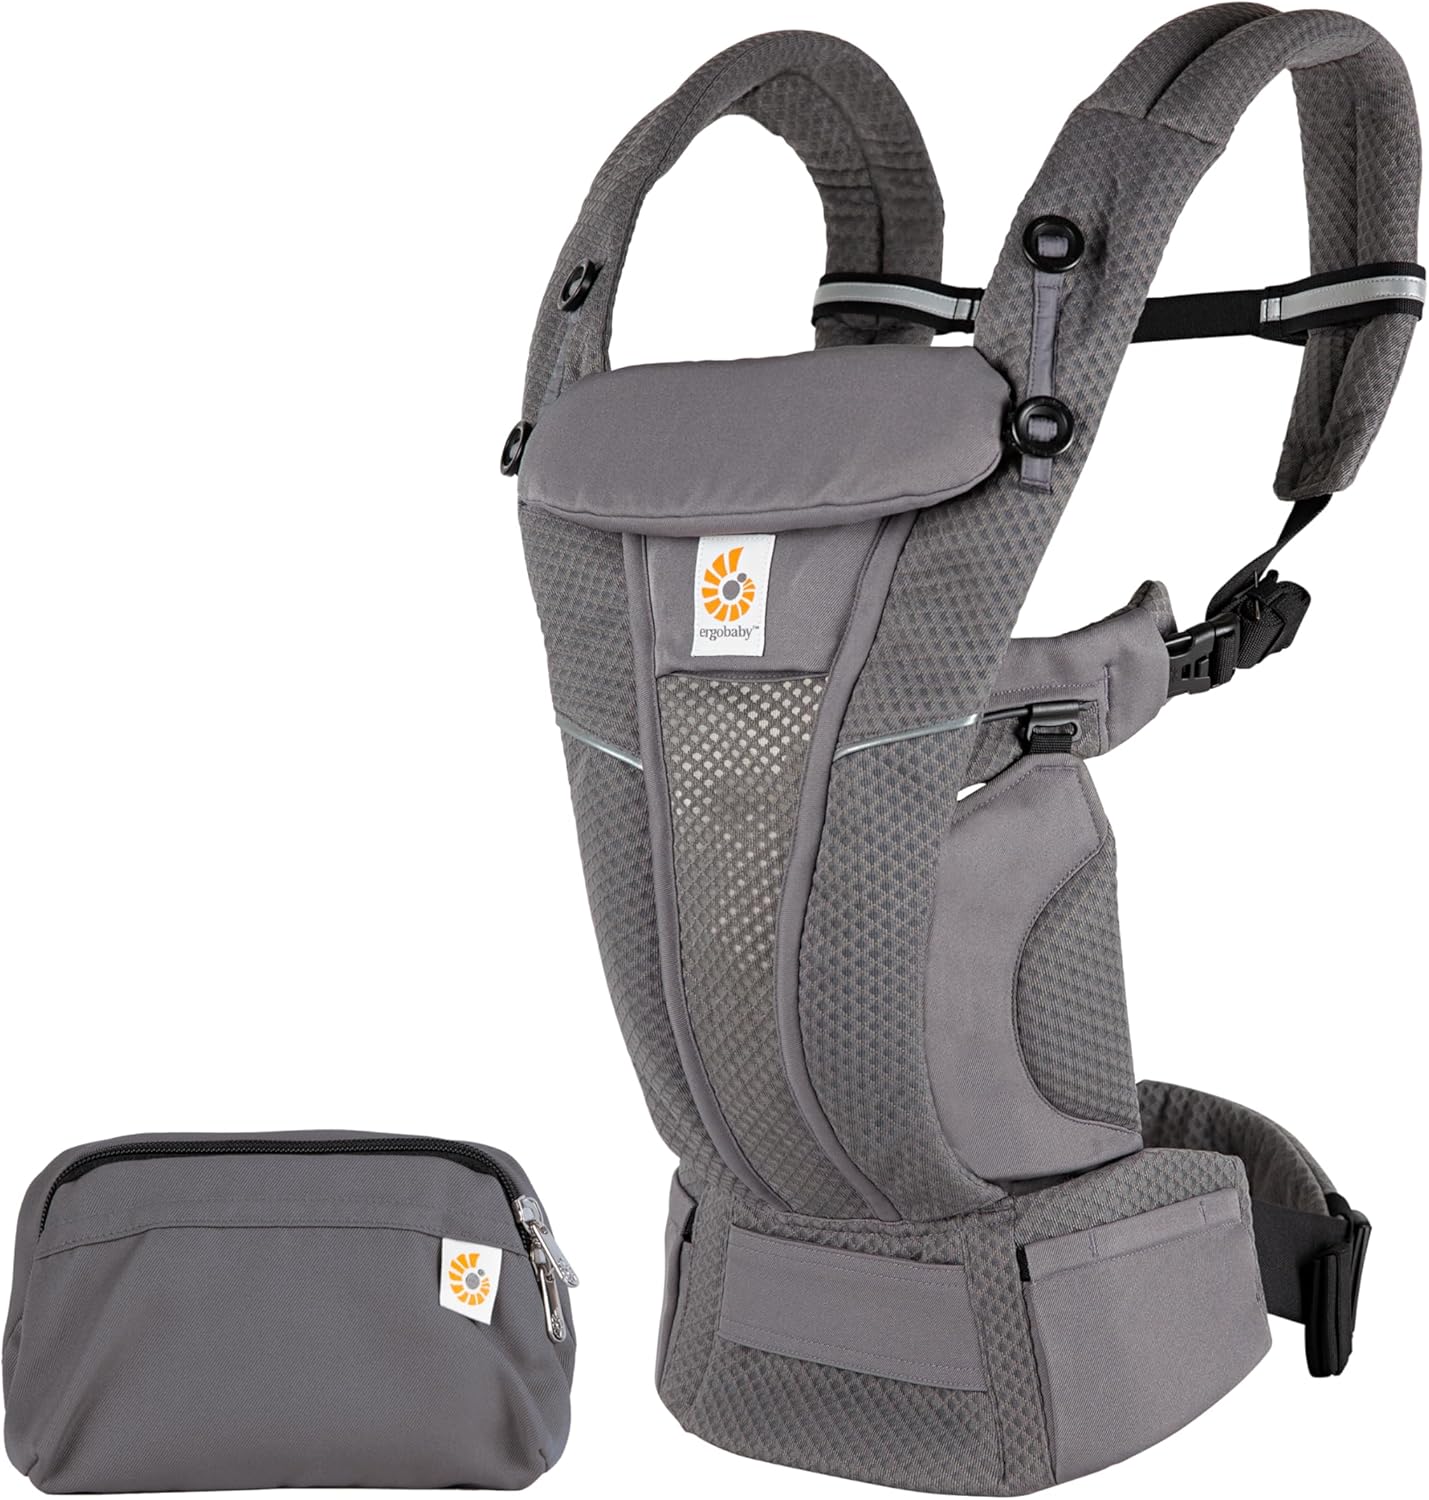
Ergobaby OMNI Breeze